Affiliated Institute
- Gyeongju National Research Institute of Cultural Heritage
- Buyeo National Research Institute of Cultural Heritage
- Gaya National Research Institute of Cultural Heritage
- Naju National Research Institute of Cultural Heritage
- Jungwon National Research Institute of Cultural Heritage
- Seoul National Research Institute of Cultural Heritage
- Wanju National Research Institute of Cultural Heritage
- Cultural Heritage Conservation Science Center
About Conservation Treatment
Metal Artifacts
About the Conservation Treatment of Metal Artifacts
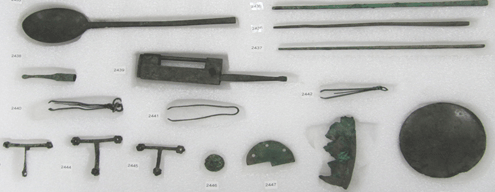
The majority of metal heritages are unearthed from the ground, etc., making them vulnerable to diverse types of damage depending on their burial environment and materials. Unearthed metal Artifacts are highly susceptible to damage due to environmental changes and corrosive factors in the atmosphere. Thus, conservation treatment is very important in preventing further damage to unearthed heritages and in restoring their original form. Also, based on data obtained from the process of conservation treatment, diverse studies on ancient metals can be conducted.
Conservation Treatment Process of Copper-Alloy Artifacts
1. Pre-treatment Survey and Analysis
- Document and take photos of surveys of materials, size, condition, and shape.
- Non-destructive survey: Survey the structures and corrosion levels that cannot be identified visually (X-ray, CT, etc.).
- Analysis:Analyze the composition materials and the corrosive compounds of artifacts(XRF, XRD etc.).
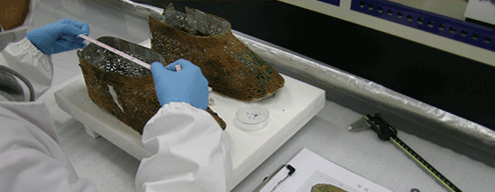
2. Cleaning
- Physical methods: Use small tools to remove soil and corroded compounds from the surface of artifacts.
- Chemical methods: Use formic acid, EDTA, etc. selectively to remove corroded substances.

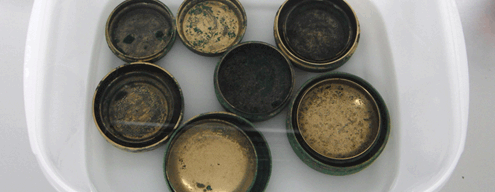
3. Stabilization Treatment (Corrosion-inhibition)
- Benzotriazole (B.T.A) method: Form a Cu-B.T.A film on a artifact’s surface to constrain corrosion.
- Dip a relic in B.T.A. 3% (In ethyl alcohol) solution to penetrate it.
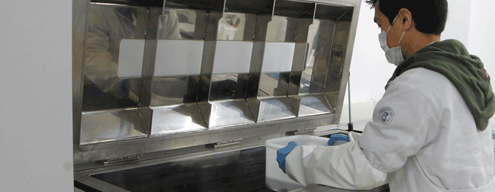
4. Consolidation
- Block corrosive factors such as oxygen and moisture in the air, thus consolidating the material of the artifacts.
- Dip a artifact in acrylic resin, by using a impregnation equipment.
5. Adhesion and Restoration
- Attach the damaged or broken pieces and recovery the original after restoring the lost parts.
- Use acrylic resins and epoxy resins according to the materials of artifacts.

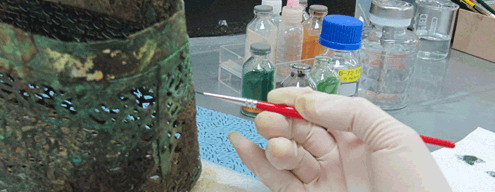
6. Coloring
- Match the color of a joined and restored part with that of the artifact’s surface.
- Coloring should be conducted in such a way that the color can only be distinguished from the artifact surface’s color within 30㎝ of the artifact, whereas it should be indistinguishable at 1m or more from the artifact.
7. After treatment Documentation
- Document and take photographs of the treatment process and post-treatment status.
- Packaging: Fix a artifact in polyethylene foam safely and package it together with materials such as silica gel that can remove moisture.
Conservation Treatment Process of Iron Artifacts
1. Pre-treatment Survey and Analysis
- Document and take photos of surveys of materials, sizes, condition, and shape.
- Non-destructive survey: Survey structures and corrosion levels that cannot be identified visually (X-ray, CT, etc.).
- Analysis: Analyze the composition materials and the corrosive compounds of artifacts(XRF, XRD etc.).
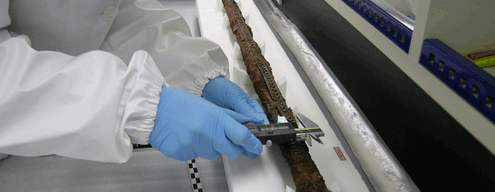
2. Removal of soil (cleaning)
- Physical methods: Use small tools and abrasive equipment to remove soil and corroded compounds from the surface of artifacts.

3. Stabilization Treatment (Desalting)
- Use alkaline solutions such as NaOH and sodium sesquicarbonate to remove chlorine ion.
- Remove Cl ion by using constant-temperature water bath.

4. Consolidation
- Block corrosive factors such as oxygen and moisture in the air, thus consolidating the material of artifacts.
- Dip a artifact in acrylic resin, by using a impregnation equipment.
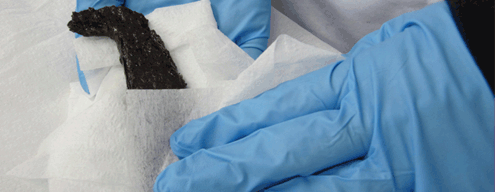
5. Adhesion and Restoration
- Attach the damaged or broken pieces and recovery the original after restoring the lost parts.
- Use acrylic resins and epoxy resins according to the materials of artifacts.
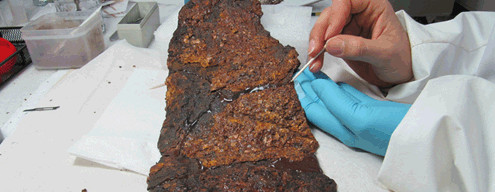
6. Coloring
- Match the color of a joined and restored part with that of the artifact’s surface.
- Coloring should be conducted in such a way that the color can only be distinguished from the artifact surface’s color within 30㎝ of the artifact, whereas it should be indistinguishable at 1m or more from the artifact.

7. After treatment Documentation
- Document and take photographs of the treatment process and post-treatment status.
- Packaging: Fix a artifact in polyethylene foam safely and package it together with materials such as silica gel that can remove moisture.
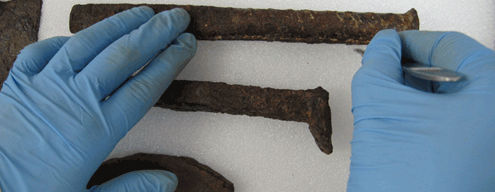
Ceramics and Glass Artifacts
About Conservation Treatment of Ceramics and Glass Artifacts
Ceramics, earthenware, roof tiles, and glass artifacts can resist chemical damage but are vulnerable to physical damage caused by incorrect conservation treatment and mismanagement. Thus, conservation treatment focuses on maintaining the original forms in consideration of conservation material stability, but earthenware have archeological value, so conservation treatment is conducted so as to distinguish between the prototype and the restored area.
Conservation Treatment Process of Ceramics and Glass Artifacts
1. Pre-treatment Survey and Analysis
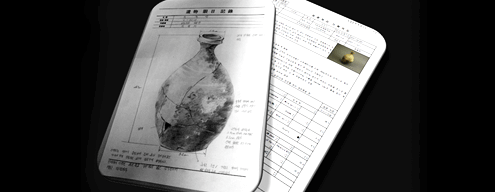
- Diagnose the relic structure, survey areas requiring restoration, type of contaminant, and the artifact’s art history and historical value, and write documentation cards
- Take pictures of and conduct 3D scanning of artifacts before conservation treatment (The whole and detailed pattern).
- Non-destructive investigation: Identify the artifact structure and past treatment traces (X-ray, UV light, etc.)
- Component analysis: Analyze the artifact’s materials and contaminants (XRF, XRD, FT-IR, etc.).
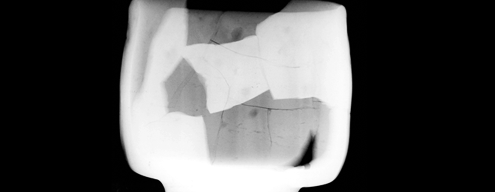
2. Dismantling
- Target ceramic wares that have already undergone repair and conservation treatment.
- Use organic solvents and other relevant chemicals and separate the restored area safely.

3. Removal of stains (cleaning)
- Apply different cleaning methods according to types of stains.
- Physical cleaning method: Use dental implements, steam cleaners, air brushes, etc.
- Chemical cleaning method: Use organic solvents, chelating agents, etc.

4. Attachment of the original fragments
- Use different kinds of glue depending on the material properties of cultural assets.
- Solvent evaporation glue (e.g., Paraloid b72, Cemedine-C)
- Chemical reaction glue (e.g., Epoxy, Cyanoacrylate, poly urethane)
- Apply coating solution on the edge of each side to form a separate coating film, and attach both sides considering reversibility.
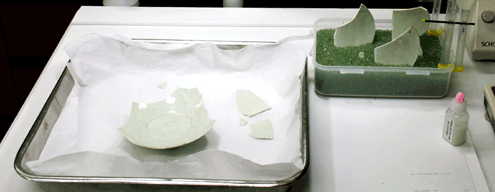
5. Restoration
- Restoration should be conducted in such a way that the restored area should not exceed the size of the ceramic form by more than one-third.
- Restoration materials include epoxy resins which can maintain the artifact form.
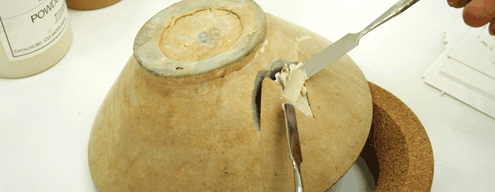
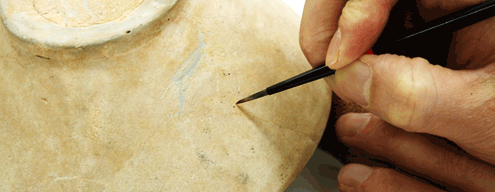
6. Inpainting
- Match the color of the restored area with that of the artifact, using pigments and acrylic water colors.
- Inpainting methods include pointillism using fine-hair brushes, and a spray method.
7. Documentation
- After conservation treatment, document the survey results, take pictures, and package for storage.
Stone Heritages
About the Conservation Treatment of Stone Heritages
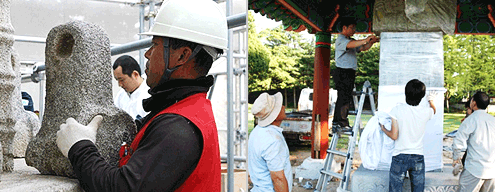
The rocks of which stone heritages are made appear to be stable materialistically, but most of them are located outdoor and are supposed to sustain rapid damage over time and according to the changing environment after drastic weathering.
Diverse types of damage - such as stone surface weathering, detachment, cracking, exfoliation, and the formation of pores - are being exacerbated by environmental pollution related to industrialization and acid rain. Thus, stone heritages require more stable and effective conservation treatment technologies.
In this regard, we conduct onsite surveys and environmental monitoring of heritages to present long-term conservation methods and to provide technical guidance on the management of damaged heritages along with conservation treatment.
Conservation Treatment Process of Stone Heritages
1. Pre-treatment Status Survey and Analysis
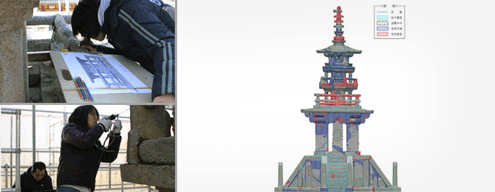
- Draft drawings of weathering impact and conduct pre-treatment documentation through detailed surveys and 3D scanning.
- Use ultrasonic technique, portable microscopes and other relevant scientific devices to survey weathering levels and strengths on the spot, and use the results in determining the scope of conservation.
2. Emergency Conservation Treatment
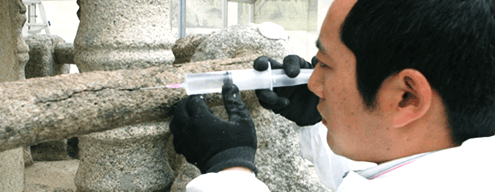
- Use reversible methods and apply emergency conservation treatment to potentially vulnerable areas of stone heritages when dismantling them.
3. Cleaning
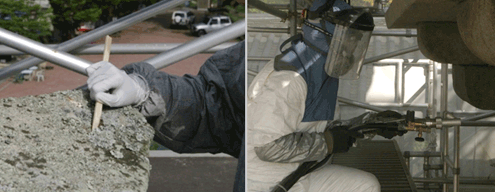
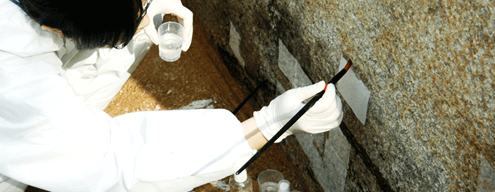
- Dry wash surface impurities, mosses, and herbaceous plants and remove them with sticks, push sticks, knives and other small implements.
- Wash using the distilled water wet cleaning, micro-abrasive and dry ice methods
4. Joining
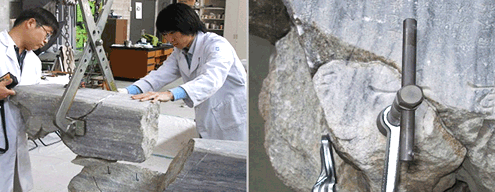
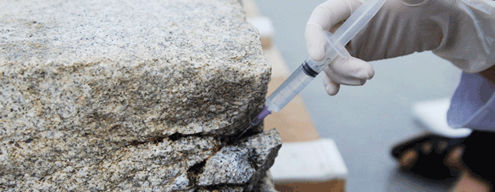
- Join damaged sections or sections restored with new stones, using polymer synthetic resins such as epoxy resins.
5. Filling
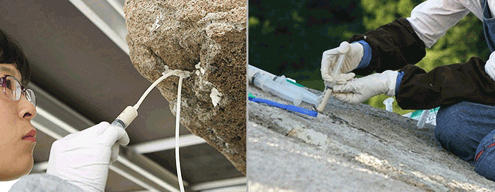
- The method by which, when pores have formed inside the rock due to weathering, one creates an mineral binder similar to the rock into a solution and fills the pores with the solution.
6. Consolidation
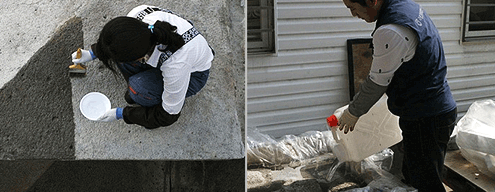
- The method by which one uses ethyl silicate agents to consolidation the rock’s surface in order to prevention it from sureface weathering action.
7. Restoration
- In the case of damaged sections restored based on an estimation of their production place and an analysis of their center axis, consider their outdoor exposure environment and apply conservation treatment to them after additional adhesion and strengthen.
Mural Heritages
About the Conservation Treatment of Mural
Korean mural include diverse ancient murals ranging from the murals that decorate the interiors and exteriors of temple buildings to those spanning the Three Kingdoms Period to the Joseon period. As they are exposed to the exterior environment, most of the murals have sustained diverse types of damage caused by contact with the atmospheric environment, by various animals and plants, and by building developments.
To conserve the domestic mural, we are building up a data based on surveys of the conservation status of domestic temple murals. We use infrared ray and survey murals and Dancheong (Traditional Korean decorative coloring on wooden buildings), thus providing the results as research data in the area of arts history among others. We have also conducted research on filling agents and other treatment materials for use in the conservation treatment of walls. These research findings will be applied in the conservation treatment of murals on earth walls. Based on the surveys of the Goguryeo ancient murals, we will conduct mid-to-long-term research on the conservation of ancient tomb murals.
Conservation Treatment Process of Mural
1. Emergency Conservation Treatment
- When relocating a mural for the purpose of conservation treatment, a facing treatment should be given to protect and stabilize the various layers of its coloring.
- Facing treatment should be conducted so as not to affect the layers of coloring, and should be easily removable to facilitate future conservation treatment.
2. Pre-treatment Survey and Analysis
- Record the mural's material, size, structure and current status on a survey card, and taking pictures.
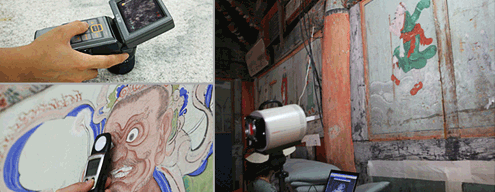
- Non-destructive survey: the method by which one surveys murals without destroying or removing them.
- Microscope survey: Use a microscope, and observe and record the mural's micro-status, contaminants, etc.
- Infrared survey: Identify and record any sketches, ink lines and calligraphic inscriptions etc. that cannot be well seen visually.
- Pigment analysis: Use a portable XRF analyzer and analyze the components of the pigments used in the layers of coloring.
3. Cleaning
- The process by which to remove contaminants from a mural’s surface.
- Wash coloring layers so as not to damage the mural.
- Dry cleaning: Use brushes, small dental implements, etc. to clean the surface.
- Wet cleaning: Use distilled water and solvents and wash the mural according to the status of its coloring layers.

4. filling
- If a mural has sustained cracking, peeling, exfoliation or other physical damage, the missing or damaged part should be reinstated.
- Use reinstating materials such as synthetic resins or filling materials similar to those to the original material.
5. Reinforcement
- Use adhesives and color the mural to prevent the crumbling and detachment of pigments and other coloring layer damage and to stabilize the mural, thereby reinforcing the layers of coloring.
- Reinforcing agents should not cause any changes to the mural and its coloring layers (Discoloration, polish). Reversible agents that can be re-treated in the future are recommended.
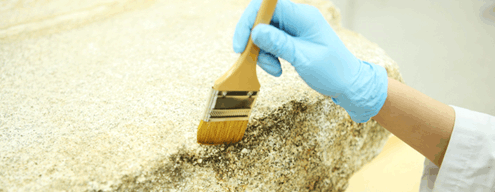
6. Color Matching
- Color matching should be applied only to the minimum scope of the reinstated area. The use of rteversible materials is recommended to eliminate color mismatching in the restored area.
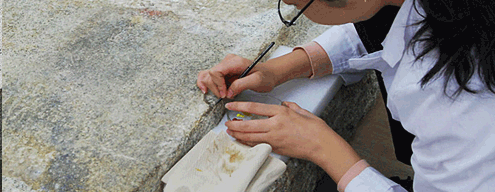
7. Post-treatment Documentation
- Take pictures of the results of treatment.
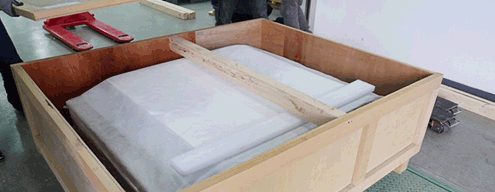
- Package a mural to ensure the safety of its coloring layers before carrying it in a relic box to a museum.
Wooden Objects
About the Conservation Treatment of Wooden Objects
Wooden objects are divided into 'Dry wood' and 'Waterlogged archeological wood'. As such, different conservation methods are applied to these materials.
‘Dry wood’ objects consist mostly of everyday items used since the Choseon period, such as wooden artifacts, furniture, and wooden Buddha statues. They are vulnerable to biological damage caused by insects and fungi, to chemical changes caused by UV rays and hydrolysis, and to artificial damage. Different methods of conservation treatment are applied accordingly to restore heritages from such damage.
‘Waterlogged archeological wood’ objects found through archeological excavations. Cells of the waterlogged archeological wood are filled with water, thus retaining their shapes; yet the hardness of the wood is weakened as cellulose, "the skeleton" of the wood, has been destroyed due to biological factors. Waterlogged wood, left exposed after excavation, contracts significantly due to drying so not only is this original form lost but also such deformation is difficult to be reversed back to its original form lost but also such deformation is difficult to be reversed back to its original form. Therefore, conservation treatment is needed that not only reinforces weakened waterlogged wood but also prevents deformation and decomposition of the wood.
Conservation Treatment Process of Dry Wooden Objects
1. Pre-treatment Survey and Analysis
- Write pre-treatment relic status surveys on documentation cards, take photographs.
- Identify damage status and structure visually.
- Conduct microscope, infrared and x-ray surveys to analyze materials and identify inner structures.
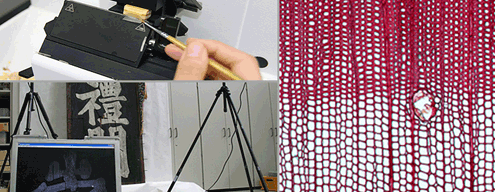
2. Dry Cleaning
- Cleaning from relics with a soft brush, cotton swab, etc.

3. Wet Cleaning
- After dry Cleaning, wet Cleaning to remove dust and fixed impurities.
- Select appropriate solvents through preliminary testing, and Cleaning with a brush, cotton swab, etc.

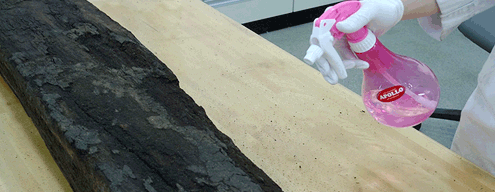
4. Resin Reinforcement
- The process by which the weakened surface of relics, carbonized wood, etc. is strengthened.
- Spray with a spray gun or air gun, or apply with a brush.
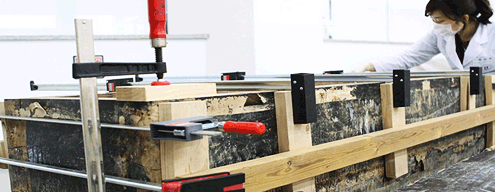
5. Drying
- The process by which moisture is dried off relics to prevent their deformation and to stabilize them.
- To prevent deformation during drying, fix the relic using a clamp and polycarbonate plate, and modify the surrounding moisture level accordingly during treatment.
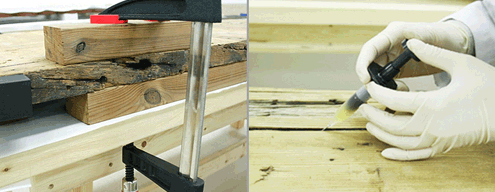
6. Joining
- Apply an adhesive (Epoxy resin and instant adhesive) to the damaged part of a relic with a syringe or brush to join it.
- After applying an adhesive, fix the relic with a clamp to ensure it joins properly.
7. Documentation after Restoration and Treatment
- Restore the damaged part with epoxy resin, and match the colors using pigments.
- In cases such as the restoration of the Sungnyemun, engrave letters on the new replaced members along with the Dancheong (Decorative coloring) treatment.
- After treatment, document the surveys, take pictures, and package the relic.

Conservation Treatment of Waterlogged Wood objects
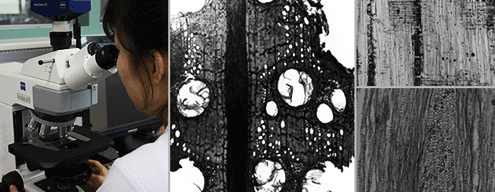
1. Pre-treatment Survey and Analysis
- Write the relic’s size, form, processed traces or used traces location, etc. on the relic survey card, before taking pictures of the whole and details of the relic.
- Analyze the type with a microscope, and confirm records such as calligraphic inscriptions through infrared surveys.
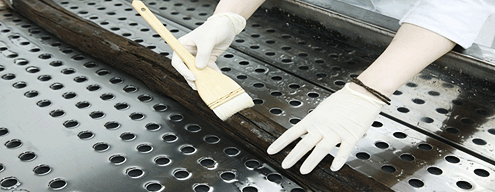
2. Cleaning
- Use brushes and knives that are suitable for the relic's state of deterioration, surface condition, strength, etc.
- Usually, the relic’s strength has been weakened, so take care not to cause any damage, and remove soil and impurities.
3. Reinforcement
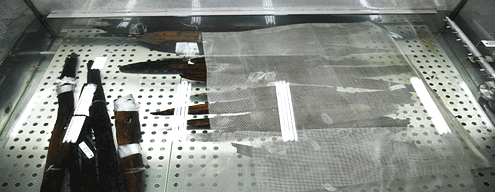
- Select reinforcing agents (PEG, Sucrose, high alcohol, etc.) according to the wood’s size and condition.
- Conduct reinforcement treatment by dipping the wood in the reinforcing agent. Treatment methods differ depending on the reinforcing agents used.
4. Drying
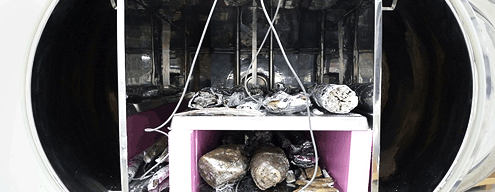
- Select drying methods according to the relic’s size, condition, etc.
- Freeze-drying: This method is widely used on wooden tablets containing calligraphic inscriptions, etc., and small relics with a high measurement accuracy.
- Controlled air drying: This method consists in slowly reducing the surrounding moisture, and is applied mainly to large relics.
5. Surface treatment and joining
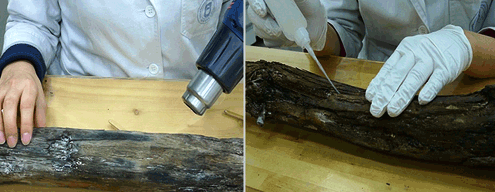
- After freeze-drying, use a soft brush, dust any remaining chemical off the surface, and clean with a dryer.
- Apply an adhesive (Epoxy resin and instant adhesive) to the damaged part of a relic with a syringe or brush to join it.
6. Documentation after Restoration and Treatment
- Restore the damaged part of a relic using an epoxy resin, and match the colors using pigments or sawdust.
- After treatment, document the survey results, take pictures, and package the relic.

Paper Heritages
About the Conservation Treatment of Paper Objets
Paper Objets are classified into tomes, paintings, and ancient documents, and mostly consist of objets that have been handed down through the generations. Paper is an important objects material which, given its organic nature, is very susceptible to the environment. Diverse types of damage may be caused depending on the conservation environment.
Based on a scientific analysis of production techniques and materials, as well as on a basic survey of the relic’s form, extent of damage, and ground material, the conservation treatment of paper objects consists in devising conservation methods, in conducting minimum conservation treatment for maintaining a object’s current condition, and in creating the optimal conservation environment. The Paper objects Office conducts the conservation treatment of paper objects such as congratulatory messages concerning the completion of the framework of Gyeongbokgung Palace and Gwanghwamun and to Admiral Yi Sun-sin, and restores and evaluates repair materials for the restoration of objects. The office also surveys the condition of paper objects storage facilities such as temples and exhibition halls, as well as proposing methods of conservation treatment.
Conservation Treatment Process of Painting objects
1. Pre/Post Survey and Analysis
- Survey the object’s form, size, and conservation condition, and write the details on the documentation card, and take photographs.
- Analyze the materials used to make the objects, as well as the pigment components if pigments were used.
- Material analysis (Dyeing method / microscope method) and analysis of pigment components (XRF).
- Basic survey: Measure the object's acidity and chromaticity to survey the degree of oxidization.
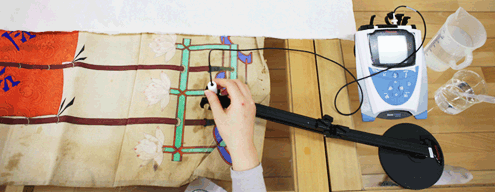
2. Removal of contaminants (cleaning)
- Apply different cleaning methods according to the status of the objects.
- Dry cleaning: Remove any contaminants from the surface with a soft brush, cotton swab, etc.
- Wet cleaning: Select the spray method or deposition method according to the condition of the objects.
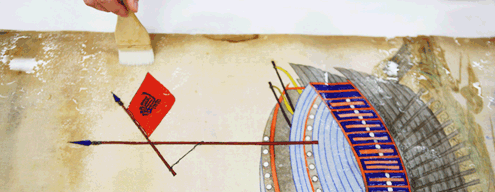
3. Fixing paint(preventing exfoliation)
- The process by which glue is applied to a object to prevent the detachment of pigments.
- Determine the concentration and application count of glue according to the condition of the objects.
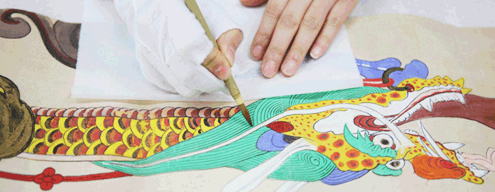
4. Removal of Old Lining Paper
- Old oxidized backing paper facilitates a object’s deterioration, so remove it.
- Before removing old lining paper, temporarily apply lining to the front of a object, such as acid-free paper, to protect the layers of coloring.
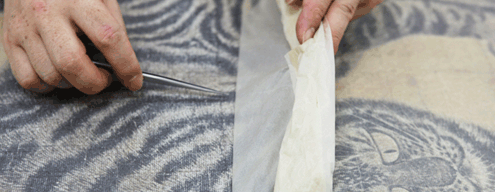
5. Reinforcement and Lining
- Reinstate the lost part of the relic using a material similar to that of the object.
- Provide a lining with naturally dyed Korean paper using wheat starch.
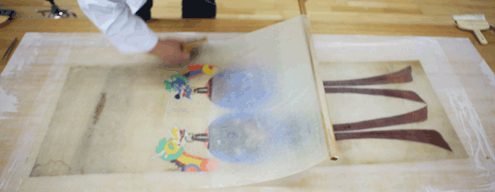
6. Color Matching and Decorative Backing
- Match the color of the reinstated part with the overall appearance of the object, using a minimal amount of natural dye, etc.
- After drying the object, frame it with a scroll, picture frame, or folding screen according to its shape, thus finishing the object.

Conservation Treatment Process of Ancient Documents and Tomes
1. Pre/Post Survey and Analysis
- Visually observe the object's binding status, size, etc., record its damage status, and take pictures of it.
- Analyze the materials used to make the objects, as well as the pigment components if pigments were used.
- Material analysis (Dyeing method / microscope method) and analysis of pigment components (XRF).
- Basic survey: Measure the object's acidity and chromaticity to survey the degree of oxidization.

2. Removal and Disassembling of Old Lining Paper
- Old oxidized lining paper facilitates a object’s deterioration, so remove it.
- For tomes, unfasten the binding strings to separate the cover, remove the inner binding paper strings, and disassemble the individual sheets of paper.
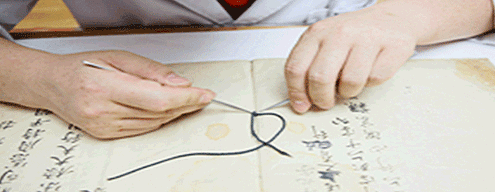
3. Removal of contaminants (cleaning)
- Dry cleaning: Remove dust and contaminants from the surface with a soft brush.
- Wet cleaning: Remove deposited materials from inside the paper, thus producing de-oxidation effects.
- For characters written in ink or areas stamped with seals, test blotting, and if blotting occurs, apply stabilization treatment to the object first.
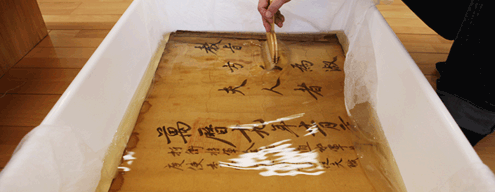
4. Dyeing of Reinforcing Paper (Color matching)
- So as not to damage the overall appearance of the object, use natural materials (Alder or pine tree bark, etc.) and dye the relic to make it similar to its original color.

5. Reinstating
- The instating method used varies depending on the object's condition and thickness.
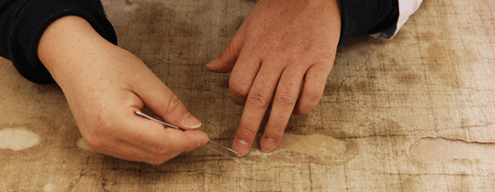
6. Binding and Finishing
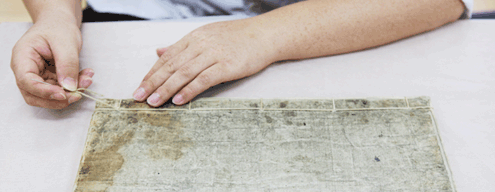
- For tomes, configure the pages in their original order to bind them again. When binding the strings, dye strings of a material similar to that originally used with a natural dyestuff.
- Storage Method.
- For ancient documents, unfold them if possible and store them in neutral folders.
- For tomes, pack them in acidity-free paper and keep them in a object box.
Fabric Heritages
About the Conservation Treatment of Textile Objects
Textile Objects are classified into costumes unearthed from a specific object site, costumes that have been handed down through the generations, and ancient woven and knitted textiles. Given the organic nature of their material, they are susceptible to damage caused by physical and chemical causes. The conservation treatment consists in preventing such damage and applying the best treatment to damage, thereby stabilizing the object. Also, these efforts are aimed at restoring the prototypes of textile objects to the maximum possible extent, to provide historical data on ancient textile materials and textures for scholars and integrated research.
Process of the Conservation Treatment of Fabric Heritages
1. Pre-treatment Survey and Analysis
- Survey the object’s outline, materials, sizes, and state of conservation, document the results, and plan conservation treatment
- Take pictures of the object’s pre-treatment condition.
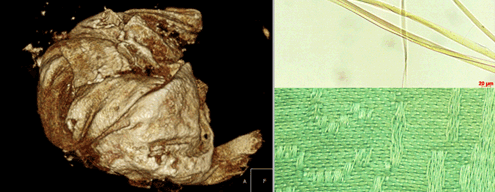
- Material analysis: Analyze fiber and pigment components (Microscope, FT-IR, SEM-EDX, and XRF).
- Structure survey: Survey the textile’s texture, method of composition, and extent of damage (Microscope, X-ray, and CT).
2. Conservation of Forms
- The process by which the creases and pleats of objects are trimmed.
- Remove any creases and pleats of objects that distort the prototypes and weaken the textiles.
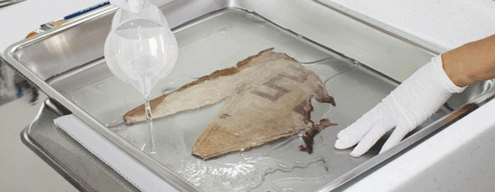
- Correction method: Raise the relative humidity of the object’s surroundings, or apply moisture to a specific part of the object, thus correcting the form physically.

3. Cleaning
- The process by which contaminants and stains are removed from the object.
- Eliminate the physical and chemical causes of damage to the object, and improve the appearance.
- Dry cleaning: Use brushes, small implements, and vacuum inhalators to remove contaminants from the surface of the object.
- Wet cleaning: Mix water and detergent (Surfactant) and use the mixture.
- Organic solvent-based cleaning: Use organic solvents to remove oily contaminants.
4. Reinforcement and Support
- Reinforcement: The process by which, if the textile has deteriorated significantly or the surface’s pigment layers are unstable, a reinforcing agent (Acrylic resin, etc.) is brushed or sprayed on to the object to protect it.
- Support: To protect damaged and weakened parts or lost parts of the object, attach reinforcing pads to it using an adhesive material or needlework.
- Dye the reinforcing textile to match it with the color of the object.
5. Post-treatment Documentation
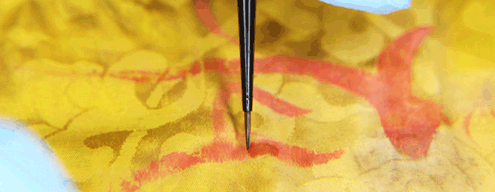
- After treatment, survey the revealed designs or other information, and document the treatment results and post-treatment condition, along with picture taking.
- Pack the object with a neutral material for safe carriage and storage.


